
Roof Valley Repair Hampshire
Roof Valley Repair Services in Hampshire
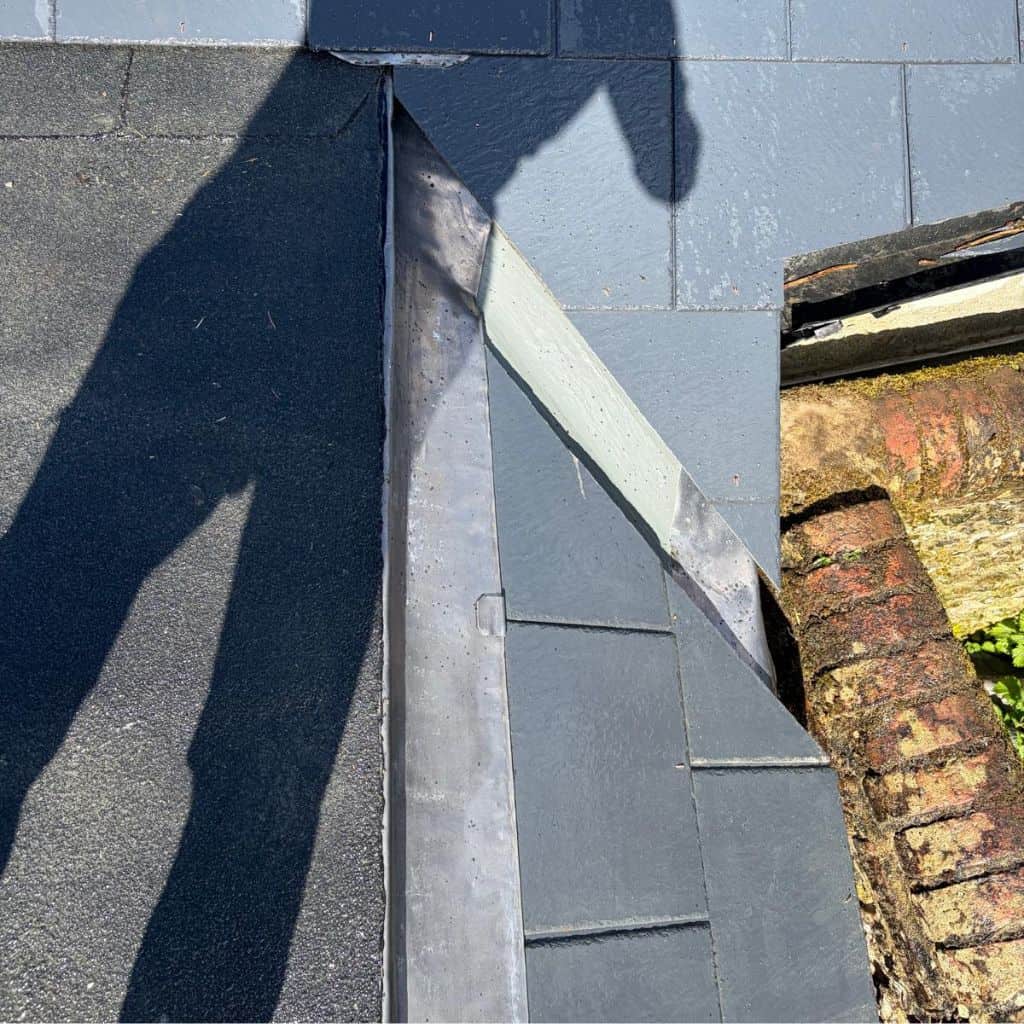
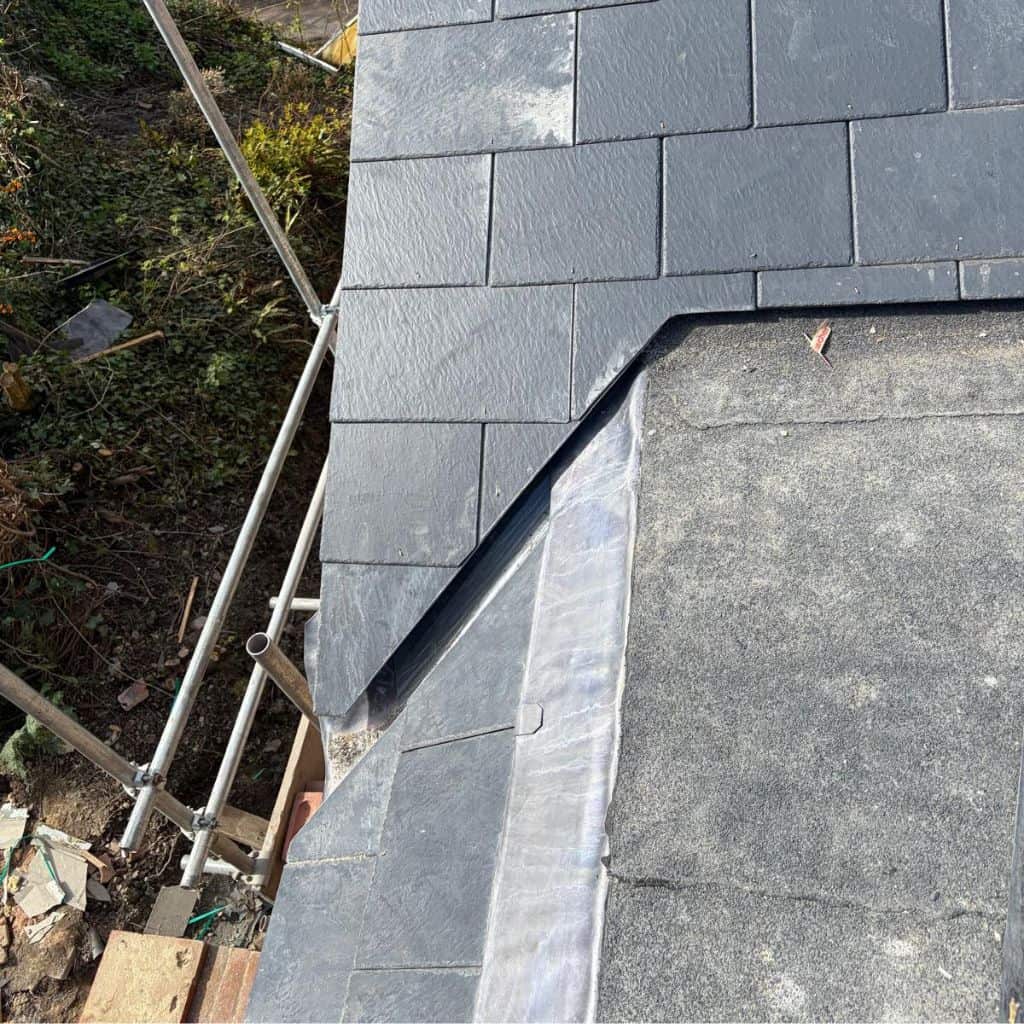
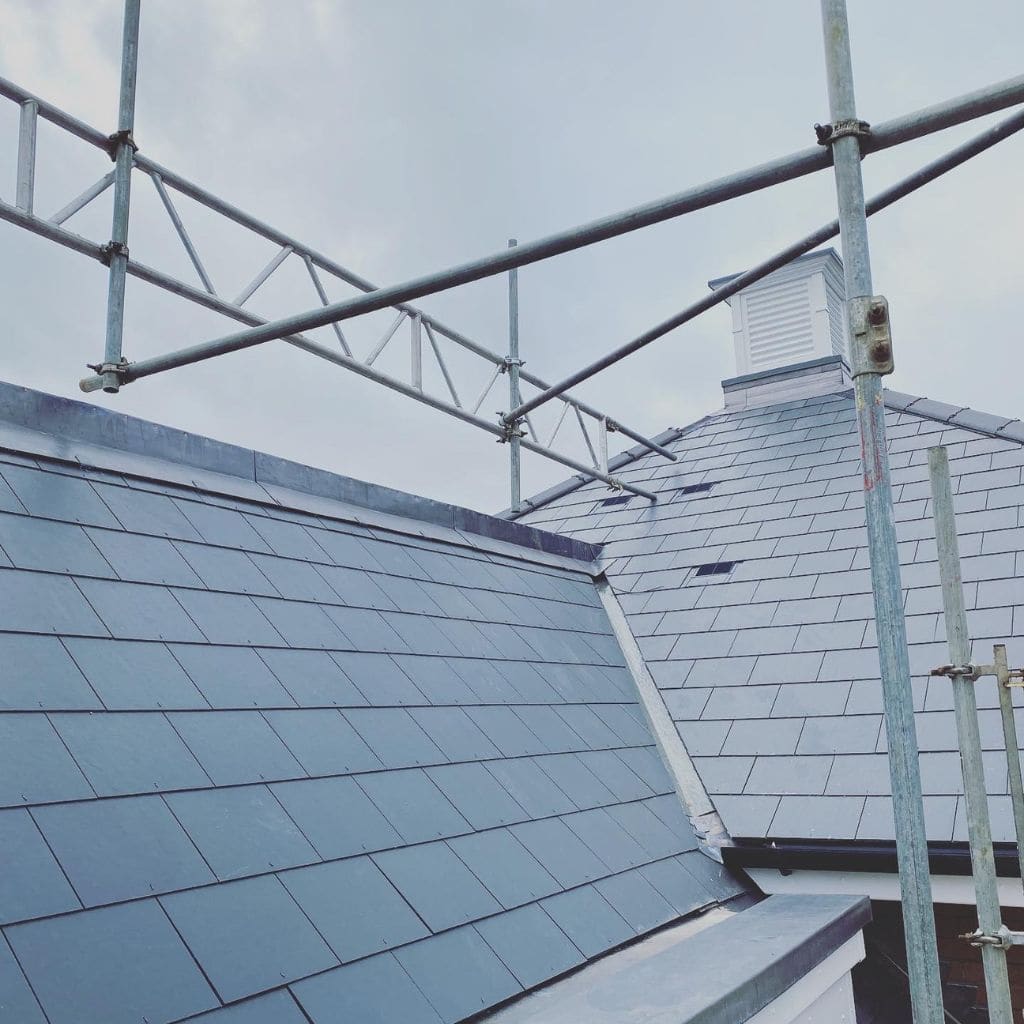
A roof valley is the junction where two roof slopes meet to direct rainwater towards the gutters. When the lining in this area splits, corrodes or fails, water can seep directly onto the rafters below, allowing the damage to spread into the insulation and ceiling if left unaddressed. Most valley repairs take one to two days from survey to completion.
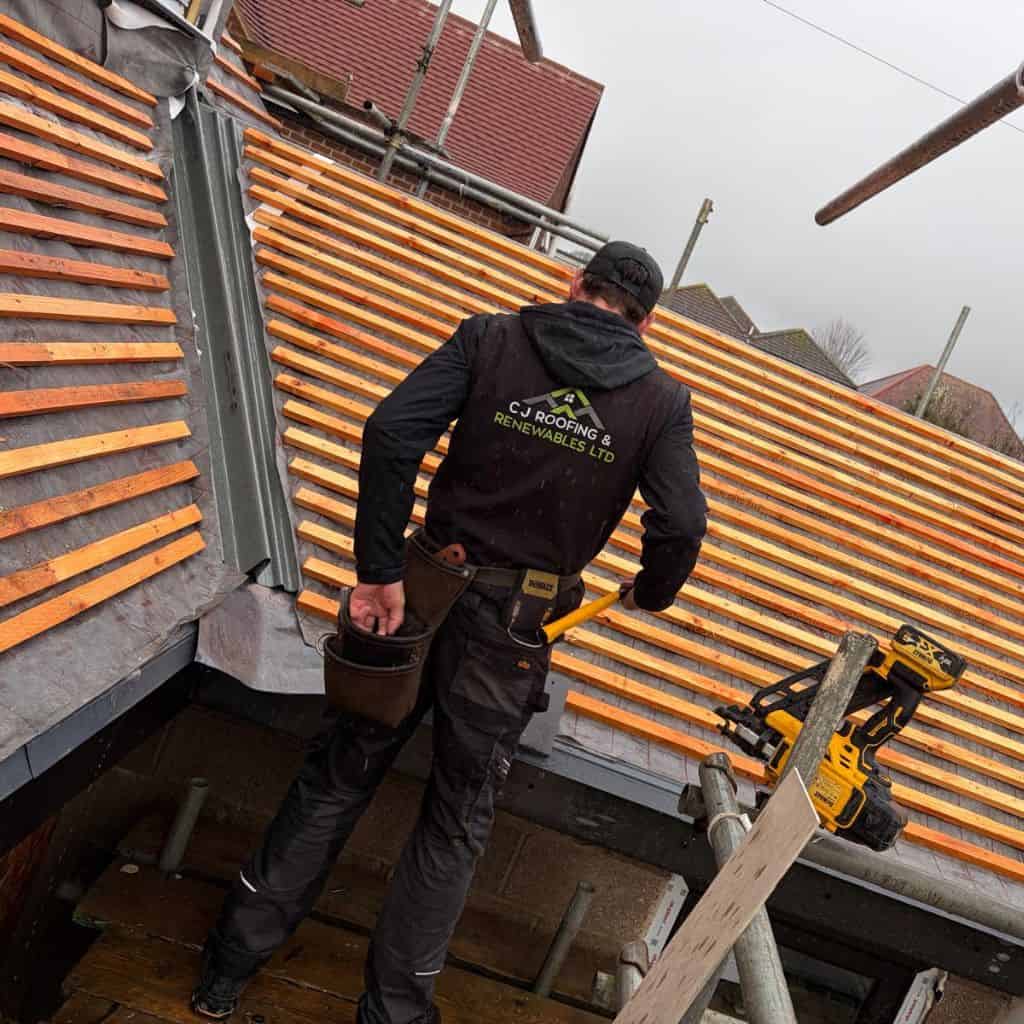
C J Roofing & Renewables Ltd specialises in valley repair across Hampshire. The work involves stripping the failed lining, reconstructing the substrate where needed, and matching reclaimed tiles to the existing slopes so the repair performs reliably and sits in with what is already there.
Call 02393873756 for a free quote. We respond within 48 hours.
What are the signs your valley needs repair rather than a clean?
Rust streaks, cracked mortar fillets and ceiling stains are signs of structural valley failure. These conditions cannot be resolved through cleaning or moss removal alone.
Signs that point to structural valley failure include:
Rust streaks or pinhole corrosion on the lining
Rust streaks or pinhole corrosion on the valley lining indicate that the metal has reached structural failure. When the lining splits or corrodes through, water can seep directly onto the rafters below.
Cleaning or moss removal will not resolve this condition. The lining itself requires replacement before the damage extends to the timber structure beneath.
Damp patches on rafters near the valley line
Damp patches on rafters near the valley line indicate that water is passing through the lining and wetting the structural timbers. This is a sign of lining failure rather than surface blockage.
These conditions cannot be resolved through cleaning or moss removal. Once moisture reaches the rafters, the work required goes beyond the lining itself and needs to be assessed promptly.
Tiles slipping into the central channel
Tiles moving into the central channel indicate that the valley lining is no longer supporting them correctly. Where moss is building up more rapidly on one side than the other, this may point to water pooling — a sign that the lining is no longer draining the slope as designed.
Mortar haunchings that flake apart when touched
Mortar haunchings that crumble or flake when touched indicate that the fillets have reached structural failure. Cleaning or moss removal will not restore their integrity, and the bedding must be re-laid to prevent water tracking beneath the tile edges.
Daylight visible from loft, sagging timbers, lead sheets splitting
Daylight visible from the loft along the valley line, sagging timbers beneath the valley, and lead sheets splitting along the centre are all signs of significant damage that requires prompt attention. Each of these points to failure that extends beyond the surface lining.
Sagging timbers beneath the valley and lead sheets splitting along the centre indicate that the damage has progressed into the structure. Older Hampshire properties frequently develop valley problems through material fatigue rather than blockage alone.
Rapid moss accumulation on one side of the valley may indicate water pooling, suggesting that the lining is no longer draining the slope effectively. A thorough inspection distinguishes between cosmetic issues and those requiring structural work.
If you have noticed any of these signs, contact us at 023 9387 3756 to arrange a survey.
Why do roof valleys leak more than other roof areas?
Valleys carry more water than any other section of a pitched roof because two slopes funnel all their rainfall into one narrow channel. During heavy downpours, the water flow rate through the valley can increase three to fourfold compared to a flat tile area, causing lead, zinc and felt linings to wear more quickly.
Accumulated leaves, moss runoff and frost expansion add further stress to the lining. A long valley supports a substantial proportion of the roof’s rainwater during storms, and the angle where two pitches meet can cause moisture to track sideways beneath the surrounding tiles.
Thermal movement compounds the problem. Metal expands and contracts daily, and this repeated cycle causes sealed joints to loosen gradually over time — a common reason valley repairs become necessary on otherwise sound roofs.
Valleys fail more often than ridges because they manage concentrated water flow continuously, which is why they are among the most common reasons for a roof repair. Hampshire’s coastal salt air also accelerates the corrosion of older zinc valleys compared with those on inland properties.
What does our roof valley repair process involve?
Our valley repair process follows five stages: survey, strip, fit, finish and documentation. Each stage is recorded with dated photographs, giving you a clear account of what was found and what was done.
Our on-site procedure includes:
Survey: ladders or drones to scan the channel and check rafters in the loft
During the survey we use ladders or drones to scan the channel and inspect the rafters from inside the loft. Each stage of the valley repair process — survey, strip, fit, finish — is documented with photographs that are shared with you.
Strip: lift tiles, remove old lining, replace any decayed timber
During the strip stage we lift the tiles on either side of the valley, remove the old lining, and replace any decayed timber. A standard valley repair typically requires one to two days on site.
Where rafter or sarking board has decayed, we install treated softwood in its place. A properly executed repair can restore watertight performance for 30 to 50 years, with the lining material determining the upper end of that life expectancy.
Fit: install new underlay and fresh lead or GRP lining with proper laps and clips
During the fit stage we install new underlay and a fresh lead or GRP lining with correct laps and clips. The new underlay is extended 150mm into the surrounding membrane to ensure proper integration with the existing roof layers.
Finish: re-cut tiles, rebed with flexible adhesive, point edges to match
During the finish stage we re-cut the tiles, rebed them with flexible adhesive, and point the edges to match the surrounding roof. We replace at least three damaged tiles on either side of the channel to ensure proper alignment across the slope.
Documentation: photograph each stage from survey through to finish
Each stage is recorded with dated photographs, providing a complete visual record from the initial survey through to final completion. These images are shared with you as part of your handover documentation.
Which valley types fail first?
Open lead valleys laid in short overlapping sections are among the most failure-prone, particularly on properties built before 1990. Five valley types commonly found in Hampshire homes that are prone to failure include:
- Short-section open lead valleys with overlapping joints
- Cement-bedded valleys that may crack within 10 to 15 years
- GRP valleys after two decades of UV exposure
- Galvanised steel valleys that may rust through from the underside
- Mitred valleys where tiles cut at an angle meet in the middle
Modern dry-fix plastic troughs perform well but may warp without adequate support battens. Lead valleys cut from oversized sheets can develop stress cracks at the joints; we use standard 1.5-metre lengths to manage thermal expansion effectively.
For heritage properties with handmade clay tiles, we provide bespoke valley solutions, as off-the-shelf replacements frequently conflict with the original tile courses.
How does the repair affect drainage across the roof?
A repaired valley restores the designed drainage path, allowing water to flow from ridge to gutter without pooling. Where the lining has sagged or a tile has encroached on the channel, water can back up beneath the surrounding tiles and enter the loft. We reset the fall and channel width to comply with current British Standards.
We also reform the bottom kicker where the valley meets the gutter, ensuring that water drops into the centre of the trough rather than spilling over the edge onto the fascia.
Correct drainage prevents fascia rot, soffit staining and erosion against the house wall. Many damp wall complaints in Hampshire trace back to poor valley drainage rather than to the walls themselves. Proper drainage also reduces the risk of ice damming during cold snaps, as the channel remains clear and free-flowing.
Why Choose C J Roofing & Renewables Ltd for Roof Valley Repair in Hampshire?
Over 15 years of experience
Connor and Jack bring over 15 years of combined hands-on roofing experience, delivering everything from small domestic repairs to large-scale commercial projects across Hampshire.

Locally based in Hampshire
Based in Portsmouth with deep local roots, we understand Hampshire’s homes, weather, and building styles - allowing us to deliver roofing work that’s built to last.
5-star rated service
We’re proud to be rated 5 stars on Google by our customers, reflecting the quality of our workmanship and our commitment to reliable, professional service.
Competent & highly trained team
Our team is fully trained and certified in asbestos awareness, working at height, and manual handling - ensuring every project is carried out safely and to industry standards.
£5 million public liability insurance
We carry up to £5 million in public liability insurance, giving you complete peace of mind that your property is fully protected while we work.
10 year workmanship guarantee
All new roof installations and replacements come with a 10-year workmanship guarantee, so you’re covered in the unlikely event of any issues.


Frequently asked questions
Take a look at the Frequently Asked Questions regarding our Roof Valley Repair service.
How does the repair affect insulation and underlay?
Although C J Roofing & Renewables Ltd does not install or replace loft insulation directly, we recommend removing wet insulation within a metre of the valley. Once moisture readings return to normal levels, fresh underlay and 270mm mineral wool should be installed by an appropriate contractor.
Soaked insulation loses a significant proportion of its thermal value, leading to increased heat loss and higher energy bills. It is important to allow the timbers to dry fully before any new materials are installed. Replacing older bitumen felt with a modern breathable membrane allows trapped moisture to escape upward rather than saturating the rafters, and improved eaves airflow reduces the risk of condensation inside the loft.
How do you rule out flashing or gutter faults first?
Where we suspect the source may be flashing or a gutter fault rather than the valley itself, we carry out water tests on the surrounding flashings, abutments and gutter joints. A hose directs water onto each suspect area while the loft is monitored from inside.
Common alternative leak sources we check include:
- Chimney flashings, soil pipe collars and dormer cheeks
- Lead step flashings against gable walls
- Mortar fillets at abutments, tapped for hollow sounds
- Gutter back-falls, joint failures and overflow points
- Split downpipes that can produce symptoms similar to a valley leak
Some suspected valley leaks are in fact gutter faults — blocked gutters or split downpipes can produce similar internal symptoms. Moisture readings taken at multiple rafter points map the spread and help identify the true source. A thorough diagnostic check prevents unnecessary rebuilding work when the real fault lies elsewhere.
How do you cover the valley if it stays open overnight?
Where the valley must remain open overnight or across a weekend, we cover the exposed section with heavy-duty tarpaulins lapped 600mm beyond the open area, with sandbags or timber battens securing the edges.
Common weather protection methods used on multi-day projects include:
- Heavy-duty tarpaulins lapped 600mm beyond the open section
- Sandbags or timber battens weighting the tarp edges
- Shrink-wrap plastic sheeting for weekend or storm cover
- Temporary GRP trays clipped into the rafters
- Plastic sheeting laid over loft insulation as a secondary barrier
Tarp coverage is staged across multi-day jobs, with corners pinned and edges taped to the underlay to prevent wind lift.
How does the repair affect tile alignment and appearance?
We re-cut and rebed tiles along both sides of the channel to match the surrounding roof. A string line stretched from ridge to eaves establishes the new tile edge, and we maintain a consistent 100mm lining exposure throughout. Replacement tiles are sourced from regional reclamation yards to match the existing material.
For properties with rare pantiles or other uncommon profiles, we fit reclaimed matches; sourcing the correct batch can take several weeks, and we do not substitute modern off-tone tiles on heritage roofs.
Mortar pointing along the cut edges is tinted to blend with the original bedding, so no bright contrast lines are visible at ground level. The valley centre remains straight from ridge to gutter, with no kinks or irregular edges apparent from below.
Who handles scaffold, access and neighbour notices?
We manage scaffold and access for every valley repair. Scaffold is erected before work begins and remains in place until all snagging is cleared. For semi-detached properties where shared scaffold access is required, you will need to obtain written permission from your neighbour before work commences. We handle skip placement, dust sheets over conservatories and daily pavement clean-down throughout the project.