How to Choose the Right Slate Roofing for Your Hampshire Home
17 September 2026
To choose the right slate roofing for your Hampshire home, match the slate type to your property's age, roof pitch,…

Roof underlayment should be installed working from the eaves upwards, with each course laid horizontally and overlapping the one below. Horizontal laps of 100mm to 150mm and vertical end laps of at least 100mm shed water correctly. The membrane is draped slightly between rafters, then secured before battens are fixed over the top.
That is the short answer. Below we set out the sequence in more detail, explain the standards we follow across Hampshire, and cover the practical points that decide whether a membrane performs for its full service life.
Laying roof underlayment is a bottom-up process. Getting the sequence right is what keeps wind-driven rain moving down and off the deck rather than sitting against the timbers.
For the full picture of how this fits into a re-roof or new build, see our Roof Underlayment Installation page.
Underlayment is held in place by the tiling battens fixed over it, supported by additional fastenings at laps and edges. The battens do most of the mechanical work, clamping the membrane against the rafters at regular centres.
On breathable membranes we avoid over-nailing between batten lines, as too many penetrations create points for water to track through. At verges, valleys and around penetrations, the membrane is dressed and secured so no unsupported edges are left exposed to wind uplift.
Many modern breathable underlays are designed to be used with integral or supplementary lap tape, particularly on lower-pitch roofs or where the loft is used as living space. Taped laps improve airtightness and reduce the risk of interstitial condensation forming under the deck.
Correct laying of roof underlayment is only half the job. The other half is managing moisture that rises from inside the home. Warm, damp air moving up into a cold loft can condense on the underside of the membrane if there is nowhere for it to escape.
Two broad approaches are used:
Which route suits your roof depends on the membrane type, the loft use and the existing construction. During a free director-led site survey we assess the deck, the loft ventilation and any signs of past condensation before recommending a detail.
Roofs across Hampshire and the South of England face steady exposure to wind-driven rain from the Solent and the Channel. On coastal and elevated properties in Portsmouth, Gosport, Hayling Island, Lymington and New Milton, wind uplift is a real consideration, so lap dimensions and fixing frequency are set toward the more robust end of the range.
Inland towns such as Basingstoke, Andover, Alton and Petersfield see less salt exposure but plenty of driving rain, so we still prioritise generous head laps and clean eaves detailing. Where properties sit under mature trees, we allow for debris in gutters and valleys when setting the eaves detail, so water is never held back against the membrane.
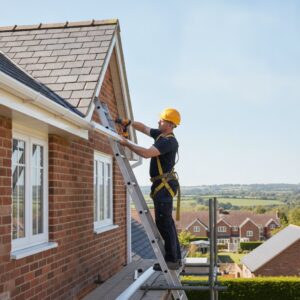
Our team is fully trained and certified in working at height, manual handling and asbestos awareness, which matters when stripping older felt on Hampshire properties where legacy materials may be present.
Before installing underlayment on a roof, we confirm the deck and structure underneath are sound. A new membrane over a failing deck simply hides the problem.
Underlayment is laid horizontally, starting at the eaves and working up to the ridge, with the printed face upward where the manufacturer specifies. Each course overlaps the one below so water always runs over the joint. This bottom-up order is central to correct roof underlayment installation.
Horizontal head laps are typically 100mm to 150mm depending on roof pitch, with side and end laps of at least 100mm. Lower pitches need the larger laps because water moves more slowly across the membrane. The exact figures follow the membrane manufacturer’s instructions and British Standard guidance.
In some cases a targeted membrane upgrade is possible, but replacing underlayment usually means lifting the tiles or slates and battens above it. Whether a partial approach is suitable depends on the condition of the covering and battens. We assess this at a free site survey and advise honestly on the best route.
If you are planning a re-roof, a new roof or a membrane upgrade anywhere in Hampshire or the South of England, we can help. Connor, Jack and the team offer honest, no-pressure advice, and all new installations carry a 10-year workmanship guarantee, backed by £5 million public liability insurance.
Call us on 02393873756 for a free director-led site survey and quote. We respond within 48 hours.
Posted by: Connor Stanley
Date: 20 August 2026